


If you’re new to Sundra, here’s a quick introduction to help you get started with the platform and make the most of its features.
1. Uploading Videos to the Dashboard
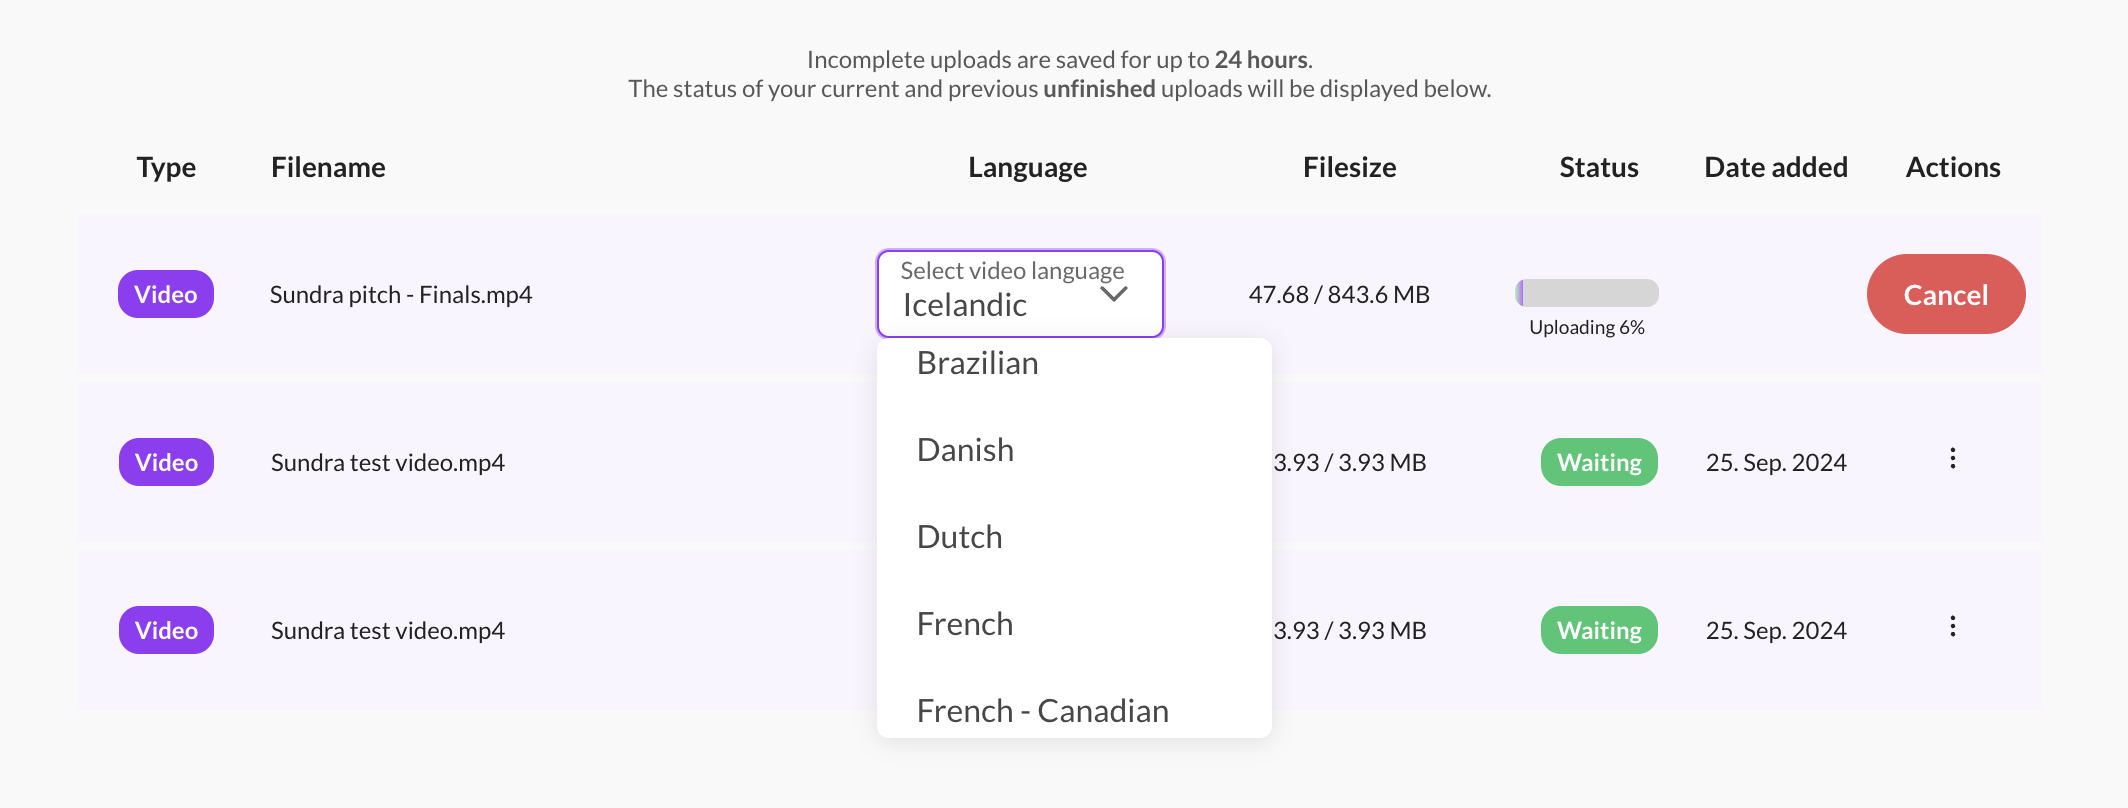
The first step in using Sundra is uploading your video on the Dashboard page. It’s important to ensure that you select the correct language when uploading, as this will influence the captions and transcriptions generated later on. While the video is uploading click on the dropdown box to select the language, if you forget to do it you can also do it afterwards in the dashboard by clicking the three dots. Once the video is uploaded, you’ll be ready to move to the next step—editing the captions.
2. Editing Captions and Timecodes
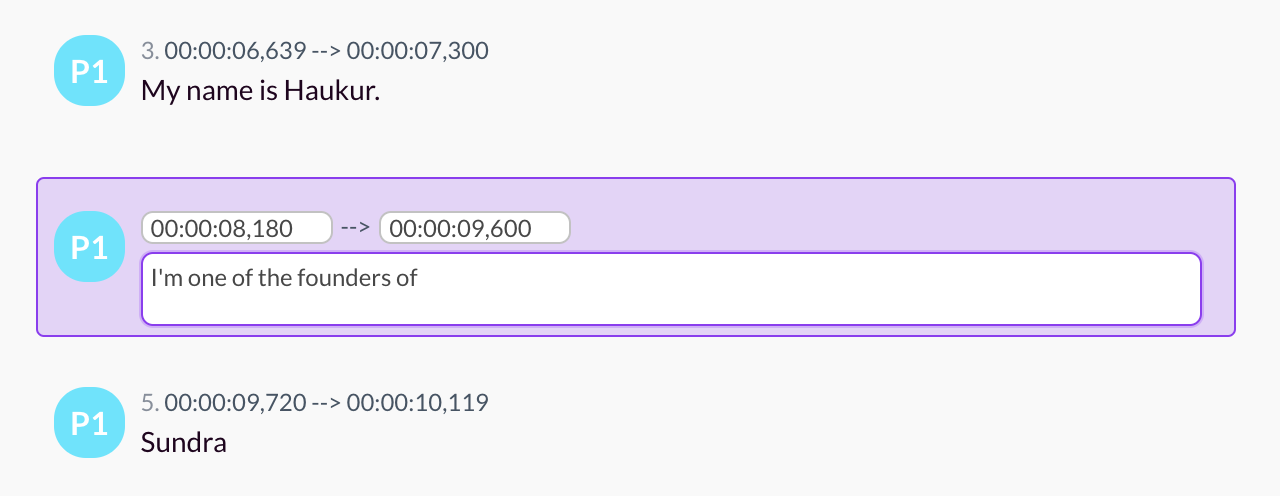
Once you’ve uploaded your video, navigate to the Captions tab and open the file you just added. In this section, you can easily edit both the text and the timecodes. To make adjustments, simply click on the text or timecode you want to change, and you can update it directly. Your changes are automatically saved as soon as you click elsewhere on the page. However, if you’re working with longer captions, it’s a good idea to refresh the page periodically to ensure everything is being saved properly.
3. Using the “Edit Time” Feature
Sundra offers a useful tool called “Edit Time”. This feature allows you to extend the display time of your captions. By using the “Extend Time” option, you can add a set number of milliseconds to all caption lines at once. This feature is particularly helpful because, when using auto-generated captions, the text often disappears as soon as the speaker stops talking. However, many users prefer to let the captions linger for a brief moment after the person finishes speaking. Sundra recommends extending the captions by 500 to 1000 milliseconds to give viewers a better experience.
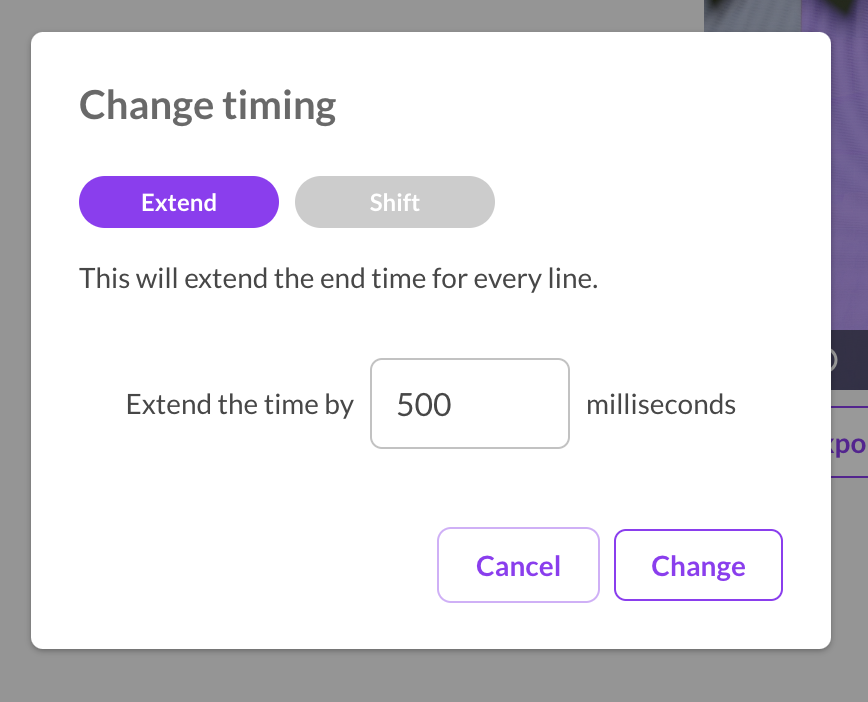
The shift option in Edit Timing is if you want every line of text, beginning and end, to be shifted back or forth by a set number of milliseconds.
4. Translate
Before translating your captions into other languages we advice you to first go over and correct as much as you can in the source language. The better the captions are for the source language the better the translations will be. Once that is done you simple click on the 3 dots in the top right corner of the captions and select "Add translation" and then pick the language you want translated into.
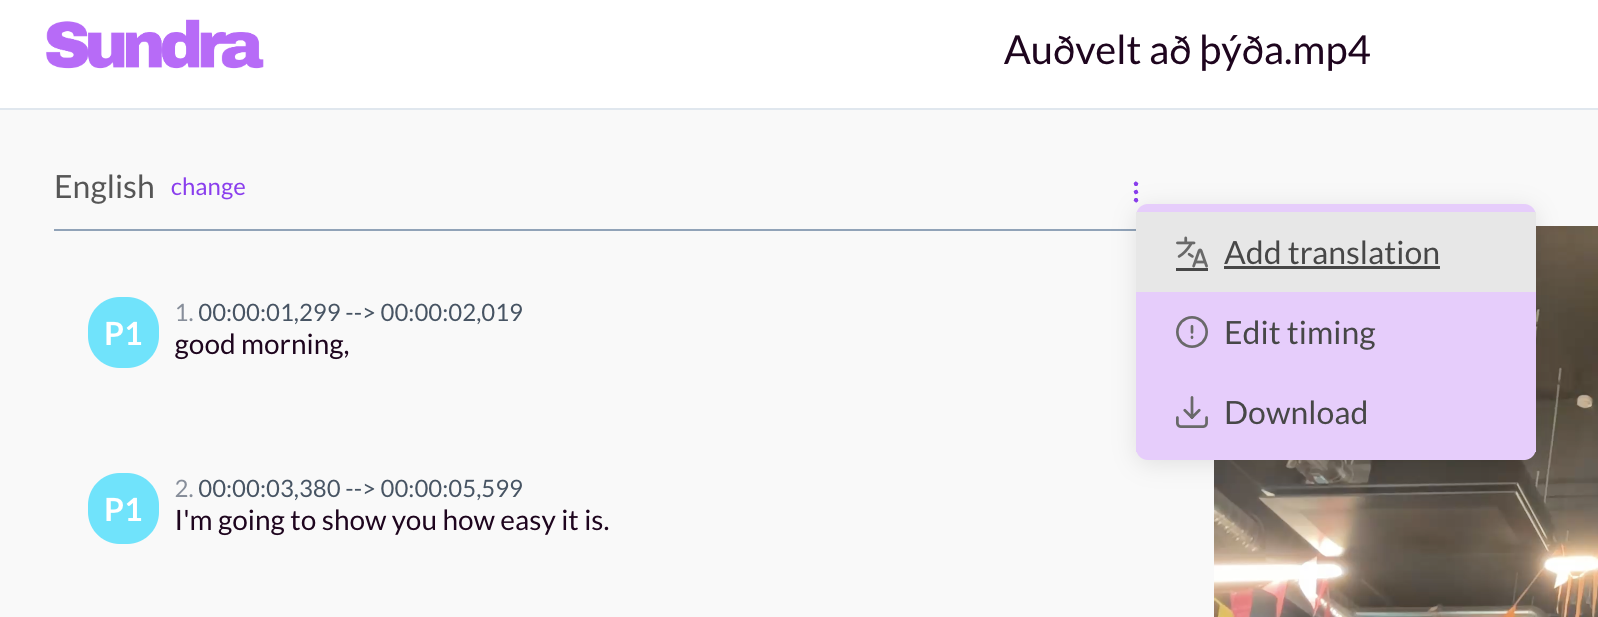
To jump between captions in different languages click on "change" next to the captions title.
5. Exporting Your Captions
Once you’ve finished editing your captions, Sundra makes it easy to export them. You can download the captions in various formats such as SRT, VTT, or TXT (for transcription purposes). Sundra also offers an option to export a dialogue list, although this feature is still being developed and will eventually allow for identifying different speakers in the list.

In Conclusion
Sundra is a powerful tool for video creators who need accurate and customizable captions. With features like easy text and timecode editing, caption time extension, translations, and multiple export options, Sundra simplifies the captioning process and enhances accessibility. Start by uploading your video, tweak your captions to perfection, and export in the format that suits your needs.
With these simple steps, you’ll be up and running with Sundra in no time!
